0018. vite 配置文件 - vite.config.js
- 1. 🎯 本节内容
- 2. 🫧 评价
- 3. 🤔 vite 配置文件是?
- 4. 🤔 配置文件可以不用
vite.config.js/.ts吗? - 5. 🤔 vite 可以直接导出一个对象吗?比如:
export default { ... } - 6. 🤔 书写 vite 配置文件如何获得智能提示呢?
- 7. 🤔 配置文件导出的内容是什么?
- 8. 🤔 配置文件导出
UserConfig都有哪些写法? - 9. 🤔 配置文件的函数式写法支持异步操作吗?
- 10. 🤔 情景配置是什么?
- 11. 🤔 在配置文件中可以读取到
VITE_环境变量吗? - 12. 💻 demos.1 - 如何在 VS Code 中调试配置文件?
- 13. 🔗 引用
1. 🎯 本节内容
- vite 配置文件是什么
- 临时指定 vite 配置文件
- 配置文件导出的多种写法
- 配置文件的智能提示问题
- 认识配置文件导出的内容
- 配置文件中的异步操作
- 情景配置
- 在配置文件中读取环境变量
- 配置文件的调试
2. 🫧 评价
- 基于官方文档 -> vite 配置 整理而来的笔记。
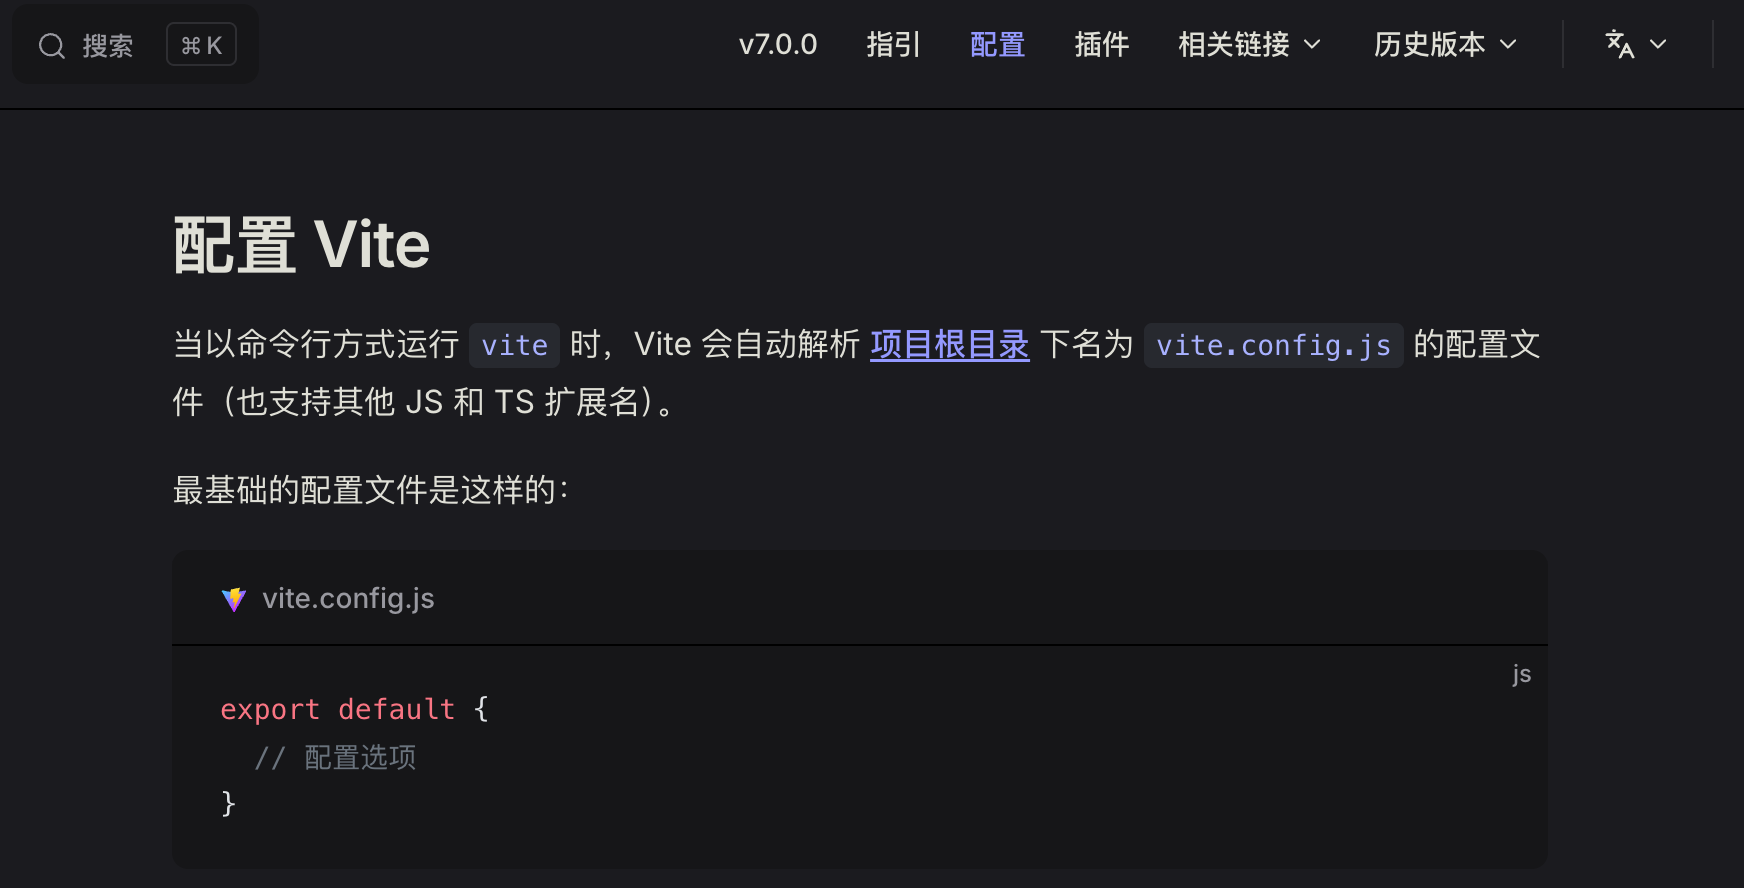
3. 🤔 vite 配置文件是?
- JS 版:
vite.config.js - TS 版:
vite.config.ts - 这两种格式都 ok,具体得看你的项目是否是基于 ts 的,如果是,则使用
.ts后缀,否则使用.js后缀。
4. 🤔 配置文件可以不用 vite.config.js/.ts 吗?
- 可以的。
vite --config my-config.js命令可以指定使用特定的配置文件。- 你可以指定一个自定义的配置文件,而不是使用默认的
vite.config.js或vite.config.ts
bash
# 用法
vite --config my-config.js
vite --config path/to/my-config.js- 适用场景:
- 多环境配置(如开发、测试、生产环境使用不同配置)
- 项目中有多个配置文件需要切换
- 临时使用特定配置进行构建或开发(临时测试)
- 这种方式可以让你灵活地使用不同的配置文件,而不需要重命名或替换默认的配置文件。
- 比如,你可以在执行某个
package.json文件中的scripts字段中的vite命令的时候,加上--config xxx选项参数,表示此时你想要以xxx作为本次vite命令执行的配置文件。
- 比如,你可以在执行某个
注意
- 上述这种修改配置文件的方式,是 临时 的。
bash
# 使用自定义配置文件启动开发服务器
vite --config my-config.js

# 下次直接运行 vite,仍然使用默认的 vite.config.js/.ts
vite5. 🤔 vite 可以直接导出一个对象吗?比如:export default { ... }
- 可以。
ts
// 可以直接导出一个对象
// 这是配置文件最基础的写法
// 虽然简洁,但是无法获取智能提示
export default {
  // 配置选项
}6. 🤔 书写 vite 配置文件如何获得智能提示呢?
- 官方提供了 3 种方式:
- 方法 1. 使用
JSDoc - 方法 2. 使用
defineConfig - 方法 3. 使用 TS 强类型约束
- 方法 1. 使用
js
// 因为 Vite 本身附带 TypeScript 类型,
// 所以你可以通过 IDE 和 jsdoc 的配合来实现智能提示:
/** @type {import('vite').UserConfig} */
export default {
  // ...
}js
// 可以使用 defineConfig 工具函数,
// 这样不用 jsdoc 注解也可以获取类型提示:
import { defineConfig } from 'vite'

export default defineConfig({
  // ...
})js
// Vite 也直接支持 TypeScript 配置文件。
// 可以在 vite.config.ts 中使用上述的 defineConfig 工具函数,或者 satisfies 运算符
import type { UserConfig } from 'vite'

export default {
  // ...
} satisfies UserConfig7. 🤔 配置文件导出的内容是什么?
- 导出的是一个
UserConfig配置对象,你可以在 vite 仓库中的 vite/packages/vite/src/node/config.ts 文件中找到UserConfig的定义。 - 这个对象包含了一系列 key,这些 key 就是 vite 的配置项。
- 有关配置选项的详细介绍,可查阅官方文档 Vite 配置。
- 这一章节下的文章,主要就是在介绍 vite 的配置。
ts
// @ts-nocheck
// copied from: https://github.com/vitejs/vite/blob/main/packages/vite/src/node/config.ts
export interface UserConfig extends DefaultEnvironmentOptions {
  /**
   * Project root directory. Can be an absolute path, or a path relative from
   * the location of the config file itself.
   * @default process.cwd()
   */
  root?: string
  /**
   * Base public path when served in development or production.
   * @default '/'
   */
  base?: string
  /**
   * Directory to serve as plain static assets. Files in this directory are
   * served and copied to build dist dir as-is without transform. The value
   * can be either an absolute file system path or a path relative to project root.
   *
   * Set to `false` or an empty string to disable copied static assets to build dist dir.
   * @default 'public'
   */
  publicDir?: string | false
  /**
   * Directory to save cache files. Files in this directory are pre-bundled
   * deps or some other cache files that generated by vite, which can improve
   * the performance. You can use `--force` flag or manually delete the directory
   * to regenerate the cache files. The value can be either an absolute file
   * system path or a path relative to project root.
   * Default to `.vite` when no `package.json` is detected.
   * @default 'node_modules/.vite'
   */
  cacheDir?: string
  /**
   * Explicitly set a mode to run in. This will override the default mode for
   * each command, and can be overridden by the command line --mode option.
   */
  mode?: string
  /**
   * Array of vite plugins to use.
   */
  plugins?: PluginOption[]
  /**
   * HTML related options
   */
  html?: HTMLOptions
  /**
   * CSS related options (preprocessors and CSS modules)
   */
  css?: CSSOptions
  /**
   * JSON loading options
   */
  json?: JsonOptions
  /**
   * Transform options to pass to esbuild.
   * Or set to `false` to disable esbuild.
   */
  esbuild?: ESBuildOptions | false
  /**
   * Specify additional picomatch patterns to be treated as static assets.
   */
  assetsInclude?: string | RegExp | (string | RegExp)[]
  /**
   * Builder specific options
   * @experimental
   */
  builder?: BuilderOptions
  /**
   * Server specific options, e.g. host, port, https...
   */
  server?: ServerOptions
  /**
   * Preview specific options, e.g. host, port, https...
   */
  preview?: PreviewOptions
  /**
   * Experimental features
   *
   * Features under this field could change in the future and might NOT follow semver.
   * Please be careful and always pin Vite's version when using them.
   * @experimental
   */
  experimental?: ExperimentalOptions
  /**
   * Options to opt-in to future behavior
   */
  future?: FutureOptions | 'warn'
  /**
   * Legacy options
   *
   * Features under this field only follow semver for patches, they could be removed in a
   * future minor version. Please always pin Vite's version to a minor when using them.
   */
  legacy?: LegacyOptions
  /**
   * Log level.
   * @default 'info'
   */
  logLevel?: LogLevel
  /**
   * Custom logger.
   */
  customLogger?: Logger
  /**
   * @default true
   */
  clearScreen?: boolean
  /**
   * Environment files directory. Can be an absolute path, or a path relative from
   * root.
   * @default root
   */
  envDir?: string | false
  /**
   * Env variables starts with `envPrefix` will be exposed to your client source code via import.meta.env.
   * @default 'VITE_'
   */
  envPrefix?: string | string[]
  /**
   * Worker bundle options
   */
  worker?: {
    /**
     * Output format for worker bundle
     * @default 'iife'
     */
    format?: 'es' | 'iife'
    /**
     * Vite plugins that apply to worker bundle. The plugins returned by this function
     * should be new instances every time it is called, because they are used for each
     * rollup worker bundling process.
     */
    plugins?: () => PluginOption[]
    /**
     * Rollup options to build worker bundle
     */
    rollupOptions?: Omit<
      RollupOptions,
      'plugins' | 'input' | 'onwarn' | 'preserveEntrySignatures'
    >
  }
  /**
   * Dep optimization options
   */
  optimizeDeps?: DepOptimizationOptions
  /**
   * SSR specific options
   * We could make SSROptions be a EnvironmentOptions if we can abstract
   * external/noExternal for environments in general.
   */
  ssr?: SSROptions
  /**
   * Environment overrides
   */
  environments?: Record<string, EnvironmentOptions>
  /**
   * Whether your application is a Single Page Application (SPA),
   * a Multi-Page Application (MPA), or Custom Application (SSR
   * and frameworks with custom HTML handling)
   * @default 'spa'
   */
  appType?: AppType
}8. 🤔 配置文件导出 UserConfig 都有哪些写法?
- 配置文件导出
UserConfig有两种写法: - 1️⃣ 直接导出一个对象
- 2️⃣ 导出一个函数
defineConfig(更灵活、更常见)
9. 🤔 配置文件的函数式写法支持异步操作吗?
- ✅ 支持。
- 如果配置需要调用一个异步函数,也可以转而导出一个异步函数。这个异步函数也可以通过 defineConfig 传递,以便获得更好的智能提示:
js
export default defineConfig(async ({ command, mode }) => {
  const data = await asyncFunction()
  return {
    // vite 配置
  }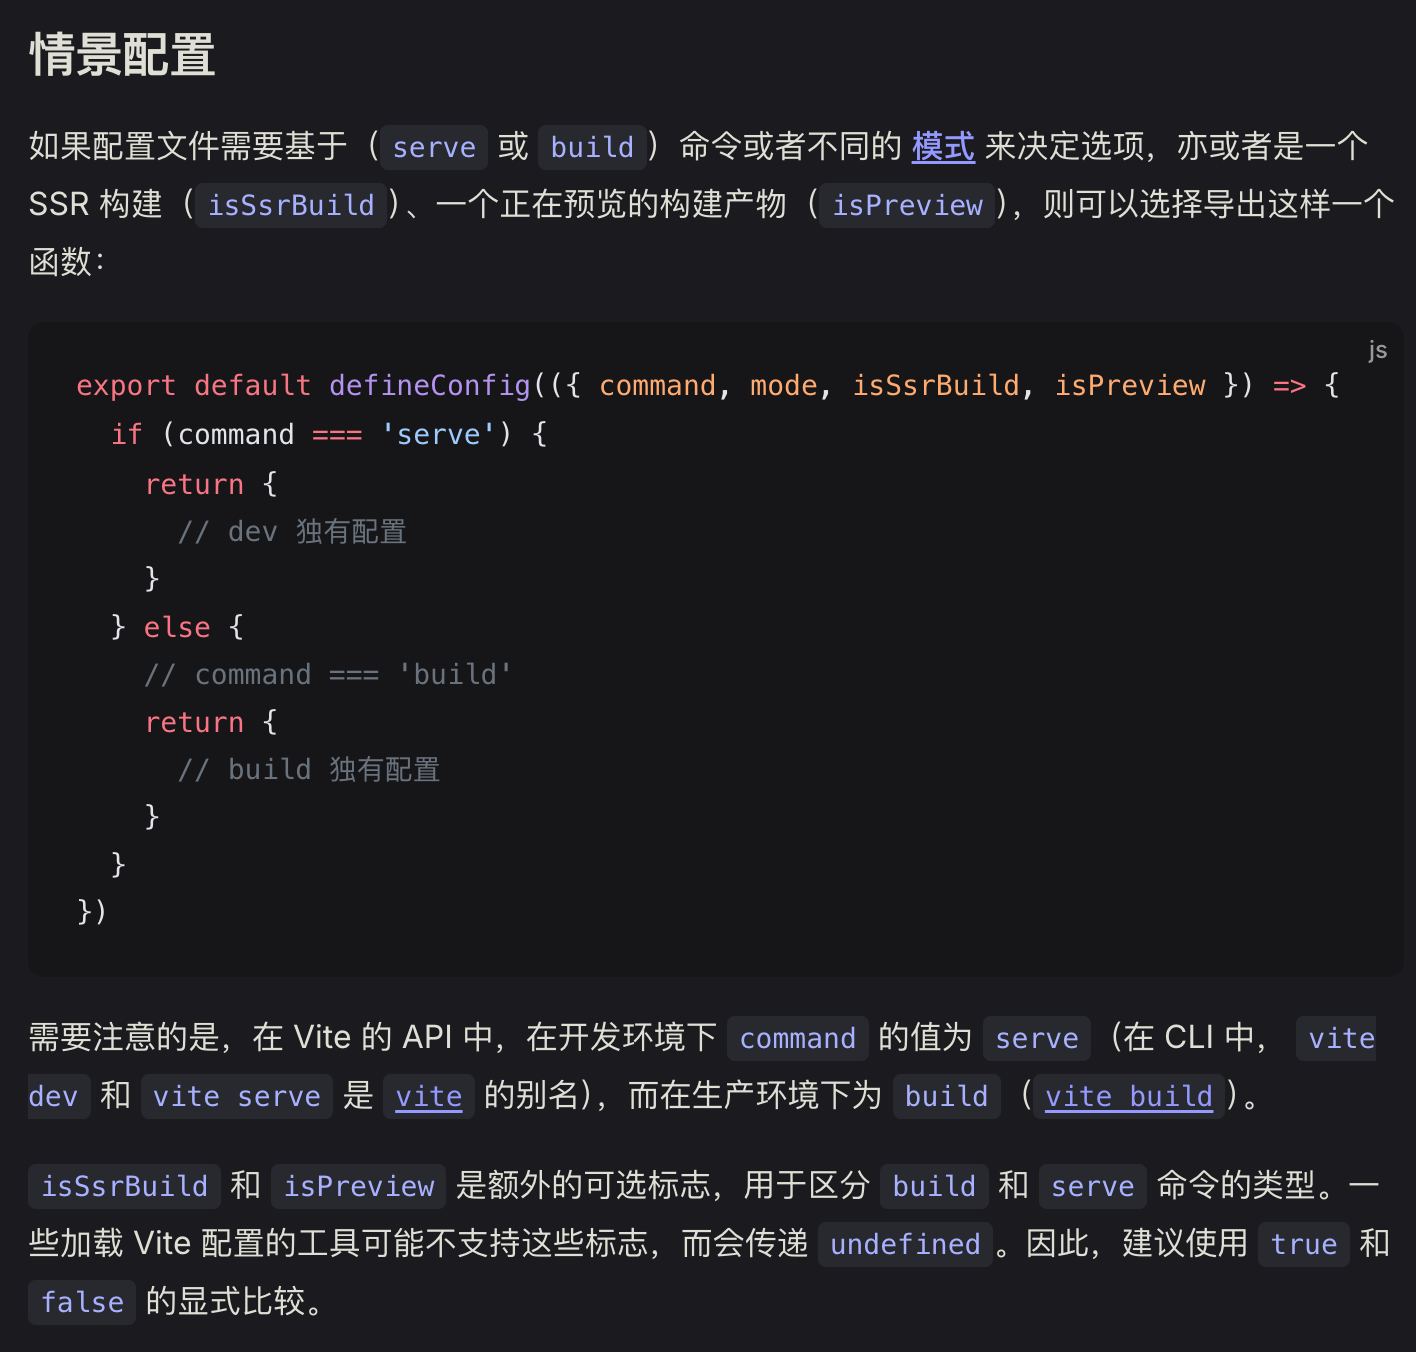
})10. 🤔 情景配置是什么?
- 当你在阅读 vite 中文版的文档时,会看到这样的标题“情景配置”,在阅读内容之前,单是看标题好像不太好理解这个词。
- 这时候瞅一瞅情景配置的英文:
conditional-config会更加直观,顾名思义,情景配置就是 条件配置。- 情景 = 条件 = 不同的运行环境
- “情景配置” 就是 根据不同的场景来区分导出的配置内容。
- 官方文档截图:
11. 🤔 在配置文件中可以读取到 VITE_ 环境变量吗?
- 先说结论:有办法读到,需要通过
loadEnv来读取,但是通过import.meta.env.*无法读取到。
- 🚫 在配置文件中,无法通过
import.meta.env.*的形式来读取。- 注意,虽然 vite 会自动将我们配置的环境变量注入到
import.meta.env对象中(为了方便我们在源码「通常指位于 src 目录下的哪些代码」中访问环境变量),但是在配置文件中,我们还无法通过import.meta.env.VITE_的形式来读取环境变量。 - 因为执行时机不同:
- 配置文件的执行时机:在 Vite 启动的最开始阶段执行,此时 Vite 还没有处理环境变量。
- 源代码的执行时机:在构建/开发服务器运行时执行,此时
import.meta.env已经被 Vite 注入。
- 官方对此的解释:
- Vite 有意推迟加载任何
.env*文件,直到用户配置解析完成之后,因为要加载的文件集合依赖于配置选项如root和envDir,以及最终的mode。 - 翻译翻译:vite 对环境变量的处理会受到配置文件导出内容的影响,因此需要先明确配置文件的导出结果,vite 才会将确定的环境变量注入到
import.meta.env中。 - 再直白一点儿:在配置函数内部,Vite 无法自动提供
import.meta.env—— 因为它自己都还没决定用哪个.env文件呢!
- Vite 有意推迟加载任何
- 注意,虽然 vite 会自动将我们配置的环境变量注入到
- 虽然无法通过
import.meta.env.*的形式来读取环境变量,但是官方还是考虑到了可能需要在配置文件中加载环境变量的需求场景,因此给我们预留了一个 APIloadEnv,它的主要作用就是用于在配置文件中加载环境变量的。
- ✅ 在配置文件中,可以通过
loadEnv函数来加载环境变量。
ts
// loadEnv 的类型声明:
// function loadEnv(mode: string, envDir: string | false, prefixes?: string | string[]): Record<string, string>
// mode 表示当前的运行模式,可以从 defineConfig 注入的参数中获取
// envDir 表示环境变量文件的目录,默认为项目根目录(即 process.cwd())
// prefixes 表示要加载的环境变量的前缀,比如 Vite 默认支持的 VITE_ 前缀
// 如果不传 prefixes,loadEnv 默认只加载以 VITE_ 开头的变量(出于安全考虑,避免意外暴露敏感信息)

// 使用示例:
// vite.config.js
import { defineConfig, loadEnv } from 'vite'

export default defineConfig(({ mode }) => {
  // 加载对应 mode 的环境变量
  const env = loadEnv(mode, process.cwd())

  // 如果在环境变量配置文件中定义了端口 VITE_PORT,那么就可以通过 env.VITE_PORT 获取到端口号。
  // 需要注意的是,无论我们在环境变量中写的是什么值,最终都会被解析为字符串类型。
  // 在使用的时候需要注意做好类型转换。
  const port = parseInt(env.VITE_PORT)

  return {
    server: {
      port: port || 3000,
    },
  }
})- 🤔 要那么麻烦吗?环境变量配置文件不就在本地吗?我写个 nodejs 脚本,用
fs.read...读取这个文件数据,解析一下不就完事儿了吗?为啥还需要用loadEnv呢? - 从技术上讲完全可行,不过这么做不符合 vite 规范。
12. 💻 demos.1 - 如何在 VS Code 中调试配置文件?
- 可以调试,但是有点儿麻烦,以下是问题背景分析和解决方案的具体步骤。
bash
pnpm create vitets
import { defineConfig } from 'vite'

export default defineConfig(({ command, mode, isSsrBuild, isPreview }) => {
  debugger
  console.log(command, mode, isSsrBuild, isPreview)
  return {}
})json
{
  "name": "vite-project",
  "private": true,
  "version": "0.0.0",
  "type": "module",
  "scripts": {
    "dev": "vite",
    "dev:debug": "node --inspect-brk ./node_modules/vite/bin/vite.js",
    "build": "tsc && vite build",
    "preview": "vite preview"
  },
  "devDependencies": {
    "typescript": "~5.9.3",
    "vite": "^7.1.7"
  }
}json
{
  "debug.javascript.terminalOptions": {
    "resolveSourceMapLocations": [
      "${workspaceFolder}/**",
      "!**/node_modules/**",
      "**/node_modules/.vite-temp/**"
    ]
  }
}- 以下是在 vite 中调试的问题背景。
- Vite 的默认打包机制会导致 VS Code 断点失效,你需要手动配置 VS Code 的 source map 解析规则,才能让断点正确映射回你编辑的原始配置文件。
- 问题背景
- 在 Vite 的默认行为下(即
--configLoader bundle): - Vite 不会直接运行你的原始配置文件(如
vite.config.js) - 而是先用 esbuild 将其打包成一个临时的、纯 JavaScript 文件
- 这个临时文件会被写入到:
node_modules/.vite-temp/目录中
- 在 Vite 的默认行为下(即
- 导致的问题
- 当你在 VS Code 中打开
vite.config.js并设置断点时: - VS Code 实际上是在调试那个“临时文件”,而不是你看到的源码文件
- 虽然有 source map 映射,但 VS Code 默认忽略
node_modules下的所有文件(为了性能和避免调试第三方库) - 结果:VS Code 找不到对应的源码位置 → 断点显示为“未验证”或“文件未找到”
- 当你在 VS Code 中打开
- 解决方案:通过在
.vscode/settings.json中添加以下配置:
json
{
  "debug.javascript.terminalOptions": {
    "resolveSourceMapLocations": [
      "${workspaceFolder}/**",
      "!**/node_modules/**",
      "**/node_modules/.vite-temp/**"
    ]
  }
}"${workspaceFolder}/**"-> 包含你项目中的所有文件(正常调试)"!**/node_modules/**"-> 排除 所有node_modules(这是 VS Code 默认行为)"**/node_modules/.vite-temp/**"-> 例外包含.vite-temp目录 —— 让 VS Code 知道这个目录下的文件需要被调试器识别
- 确保 node_modules 中只有
.vite-temp被特殊对待。 - 算是 Vite + VS Code 调试场景中的一个 经典痛点和标准解法。
- 1️⃣ 完成
.vscode/settings.json配置之后,在终端输入export NODE_OPTIONS='--inspect-brk'- 作用是:为当前终端会话中后续启动的所有 Node.js 进程全局启用调试器,并在用户代码执行前自动断点暂停。
- Node.js 启动后不会立刻运行你的脚本,会停下来等调试器连接。
- 2️⃣ 运行
pnpm dev- 本质是运行
node ./node_modules/bin/vite.js - 1️⃣ + 2️⃣ 等价于
node --inspect-brk ./node_modules/vite/bin/vite.js - 如果你经常有调试的需求,可以在
package.json中的scripts字段中加一条专门用于调试的命令,比如:"dev:debug": "node --inspect-brk ./node_modules/vite/bin/vite.js"
- 本质是运行
- 3️⃣
ctrl shift p打开 VSCode 命令面板输入Debug: Attach to Node Process,连接上 Node.js Vite 进程,进行调试。 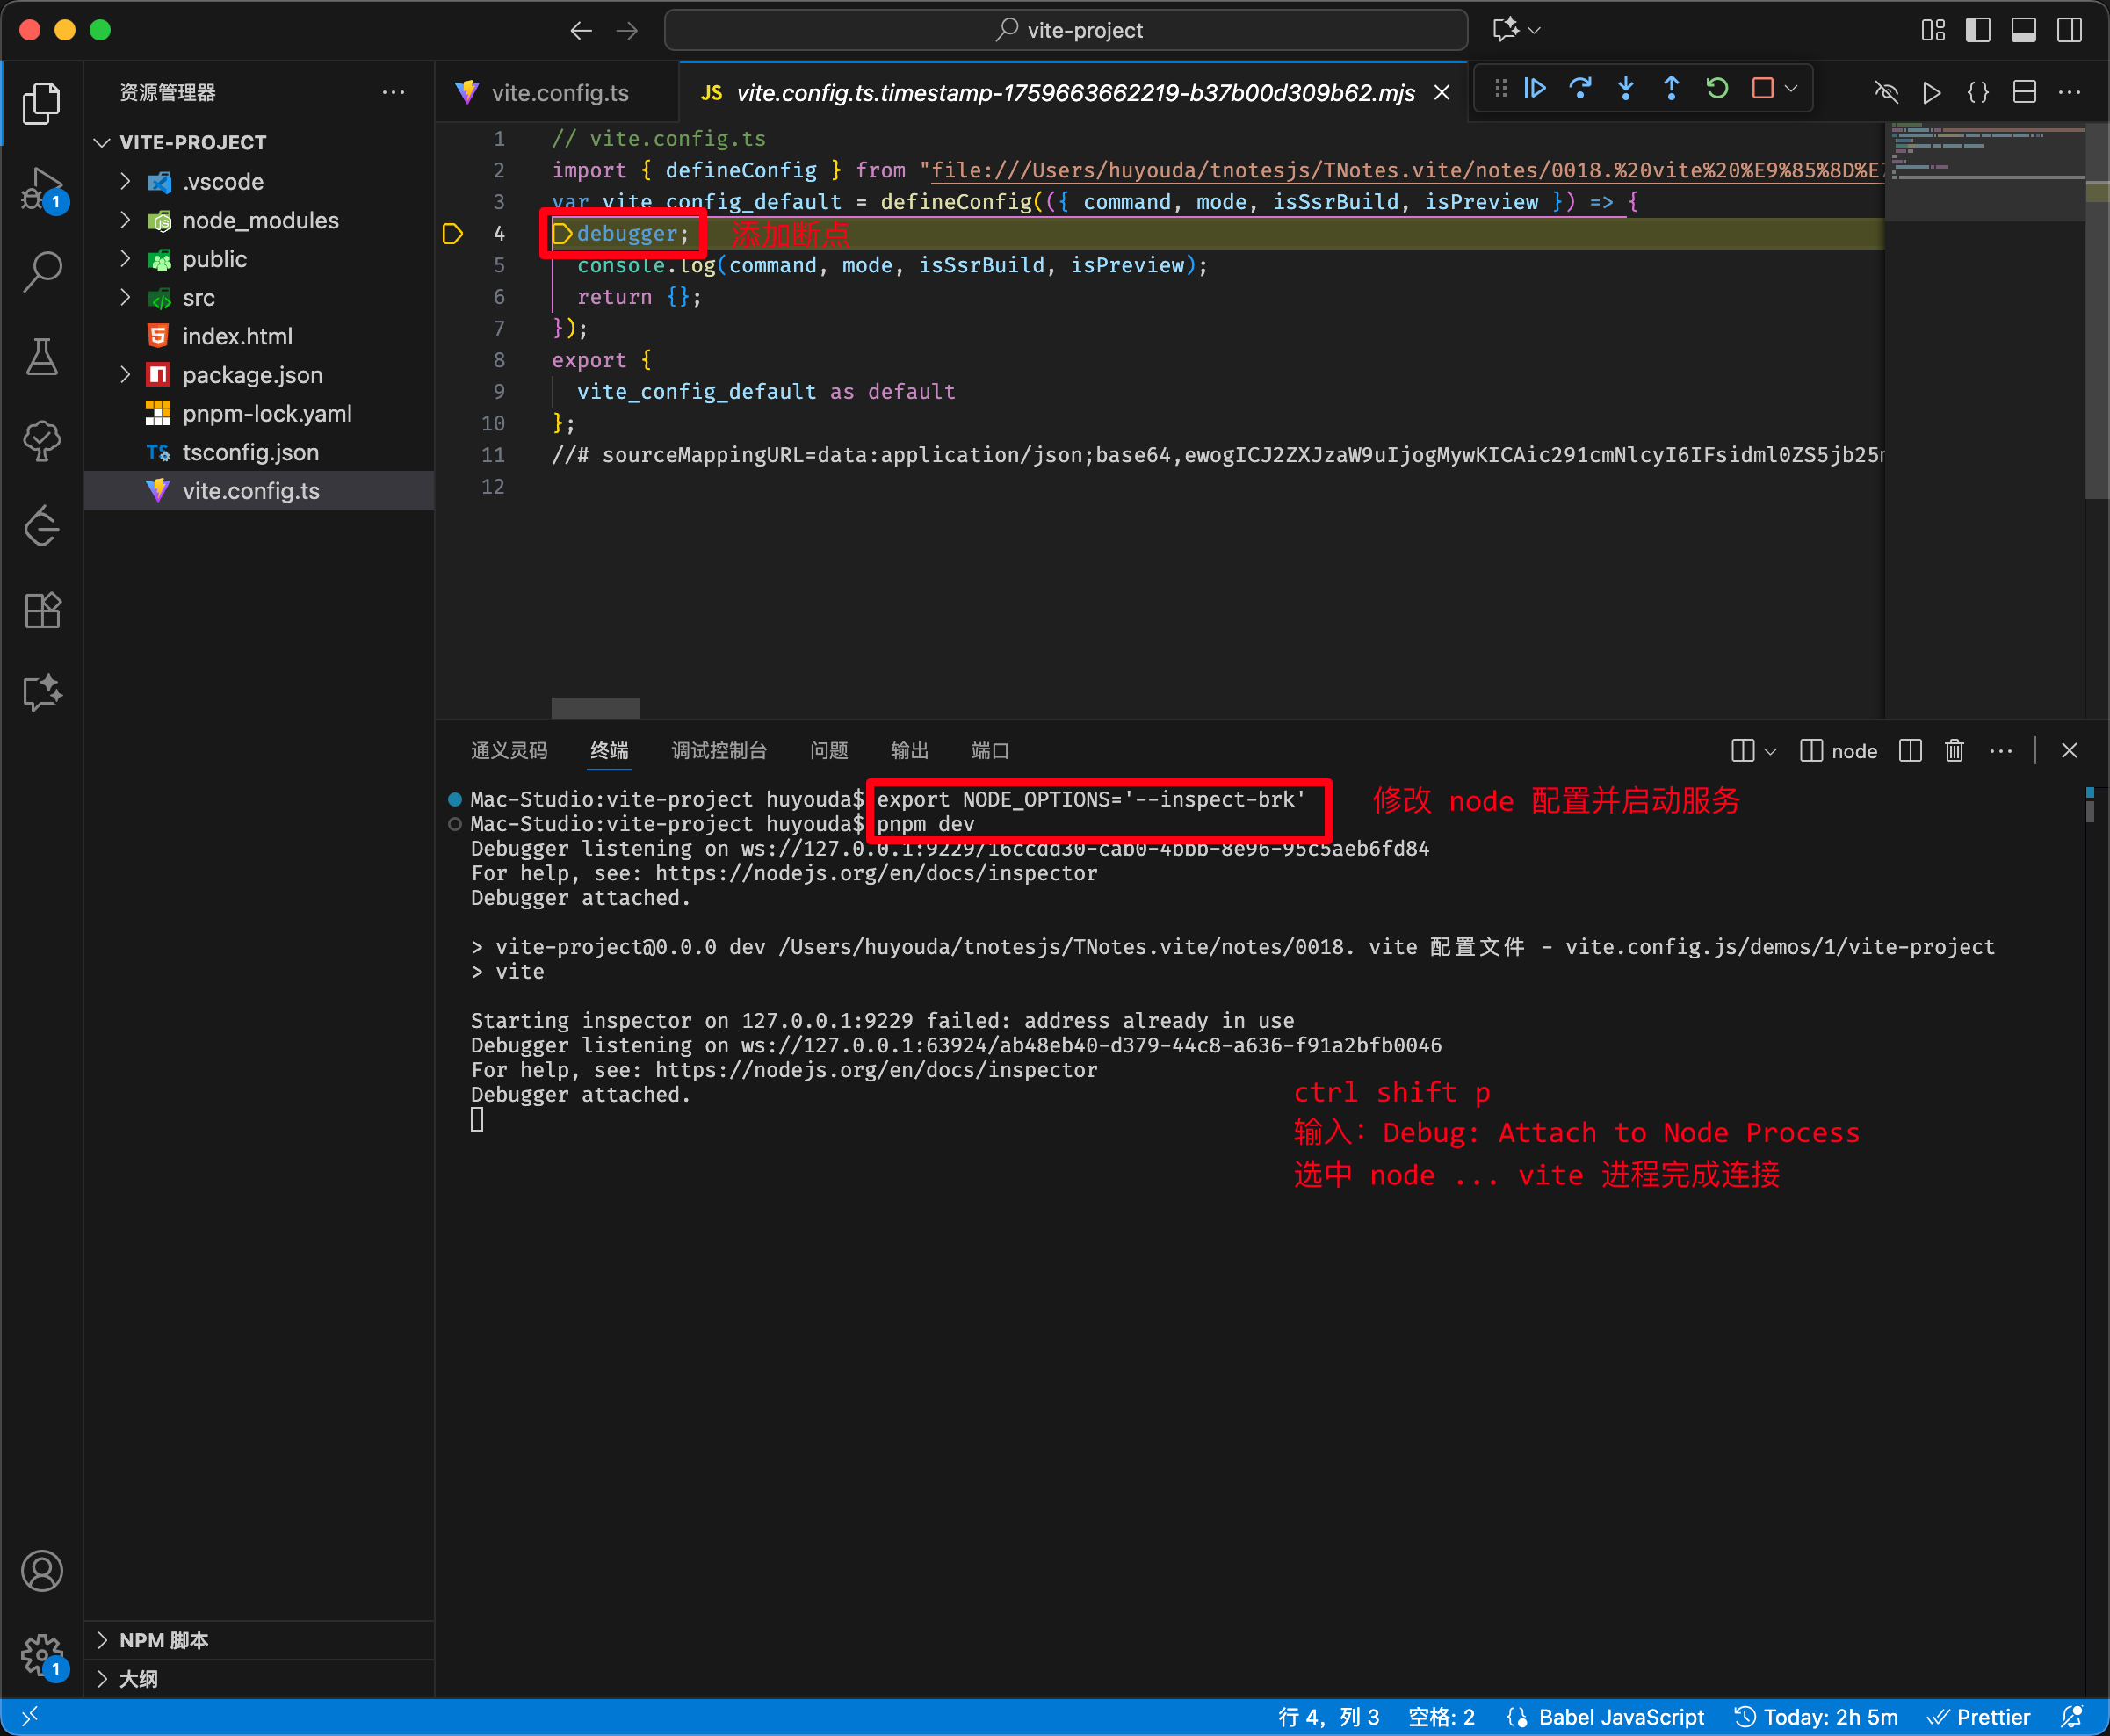
- 评价:如果是简单的调试需求,直接
console.log更是在一些。